三次元画像の強化
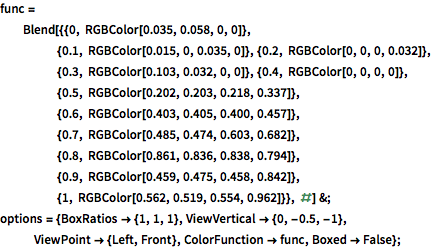
デフォルトでは,三次元画像は照明に反応しない.色の値は,単に指定の色関数で決定される.
完全なWolfram言語入力を表示する
In[3]:=
img3d = Image3D[data, "Byte", options, ImageSize -> 400]Out[3]=

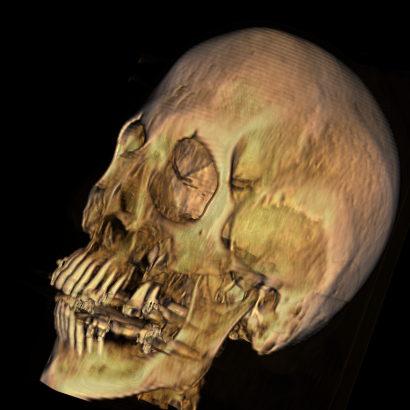
立体の照明をオンにすることによって,曲面の詳細をハイライトすることができる.この場合,スクリーンの平面に向けた指向性照明が追加され,鏡面性が画像オブジェクトに加えられている.
In[4]:=

ImageCrop[
 Show[Graphics3D[Specularity[Orange, 3], Background -> Black],
  Image3D[img3d, Method -> {"VolumeLighting" -> True}], options,
  Lighting -> {{"Directional", White, ImageScaled[{0, 0, 2}]}},
  ImageSize -> 700], {410, 410}]
Out[4]=
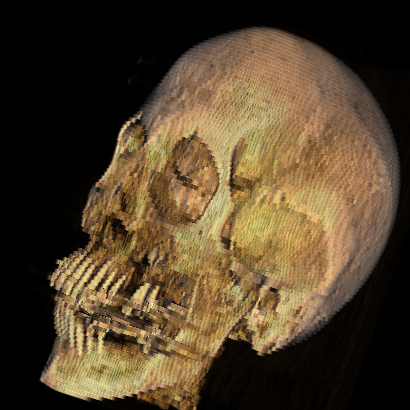
値を補間することによって,きめの粗い画像をさらにきれいにすることができる.
In[5]:=
fine = ImageCrop[
  Show[Graphics3D[Specularity[Orange, 3], Background -> Black],
   Image3D[img3d,
    Method -> {"VolumeLighting" -> True,
      "InterpolateValues" -> True}], options,
   Lighting -> {{"Directional", White, ImageScaled[{0, 0, 2}]}},
   ImageSize -> 700], {410, 410}]
Out[5]=
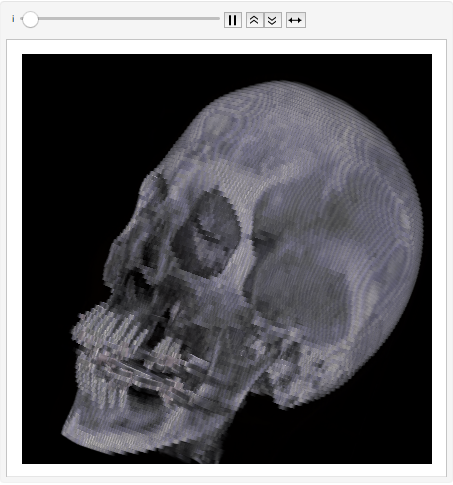
もとの画像から補間されハイライトされた画像への変化を可視化する.
完全なWolfram言語入力を表示する
In[7]:=
Animate[Overlay[{original, SetAlphaChannel[fine, i]}], {i, 0, 1},
 AnimationRate -> 1/3, AnimationDirection -> ForwardBackward]